

Connect the Autter platform
- GitHub
- GitLab
1
Sign in to Autter
Open the Autter platform and sign in. Create a trial organization or open an existing organization.
2
Choose how to start
Open repository selection. Choose I have repositories to connect for your own repository, or I don’t have a repo yet — set me up for a demo repository.
3
Connect GitHub and grant access
Complete the GitHub connection. Install the Autter GitHub App or review its access, then include the repositories Autter should review.
4
Add repositories to Autter
Return to Autter, select the repositories, and add them to your organization.
5
Verify with a pull request
Open or update a pull request in a connected repository, then look for Autter feedback and checks.
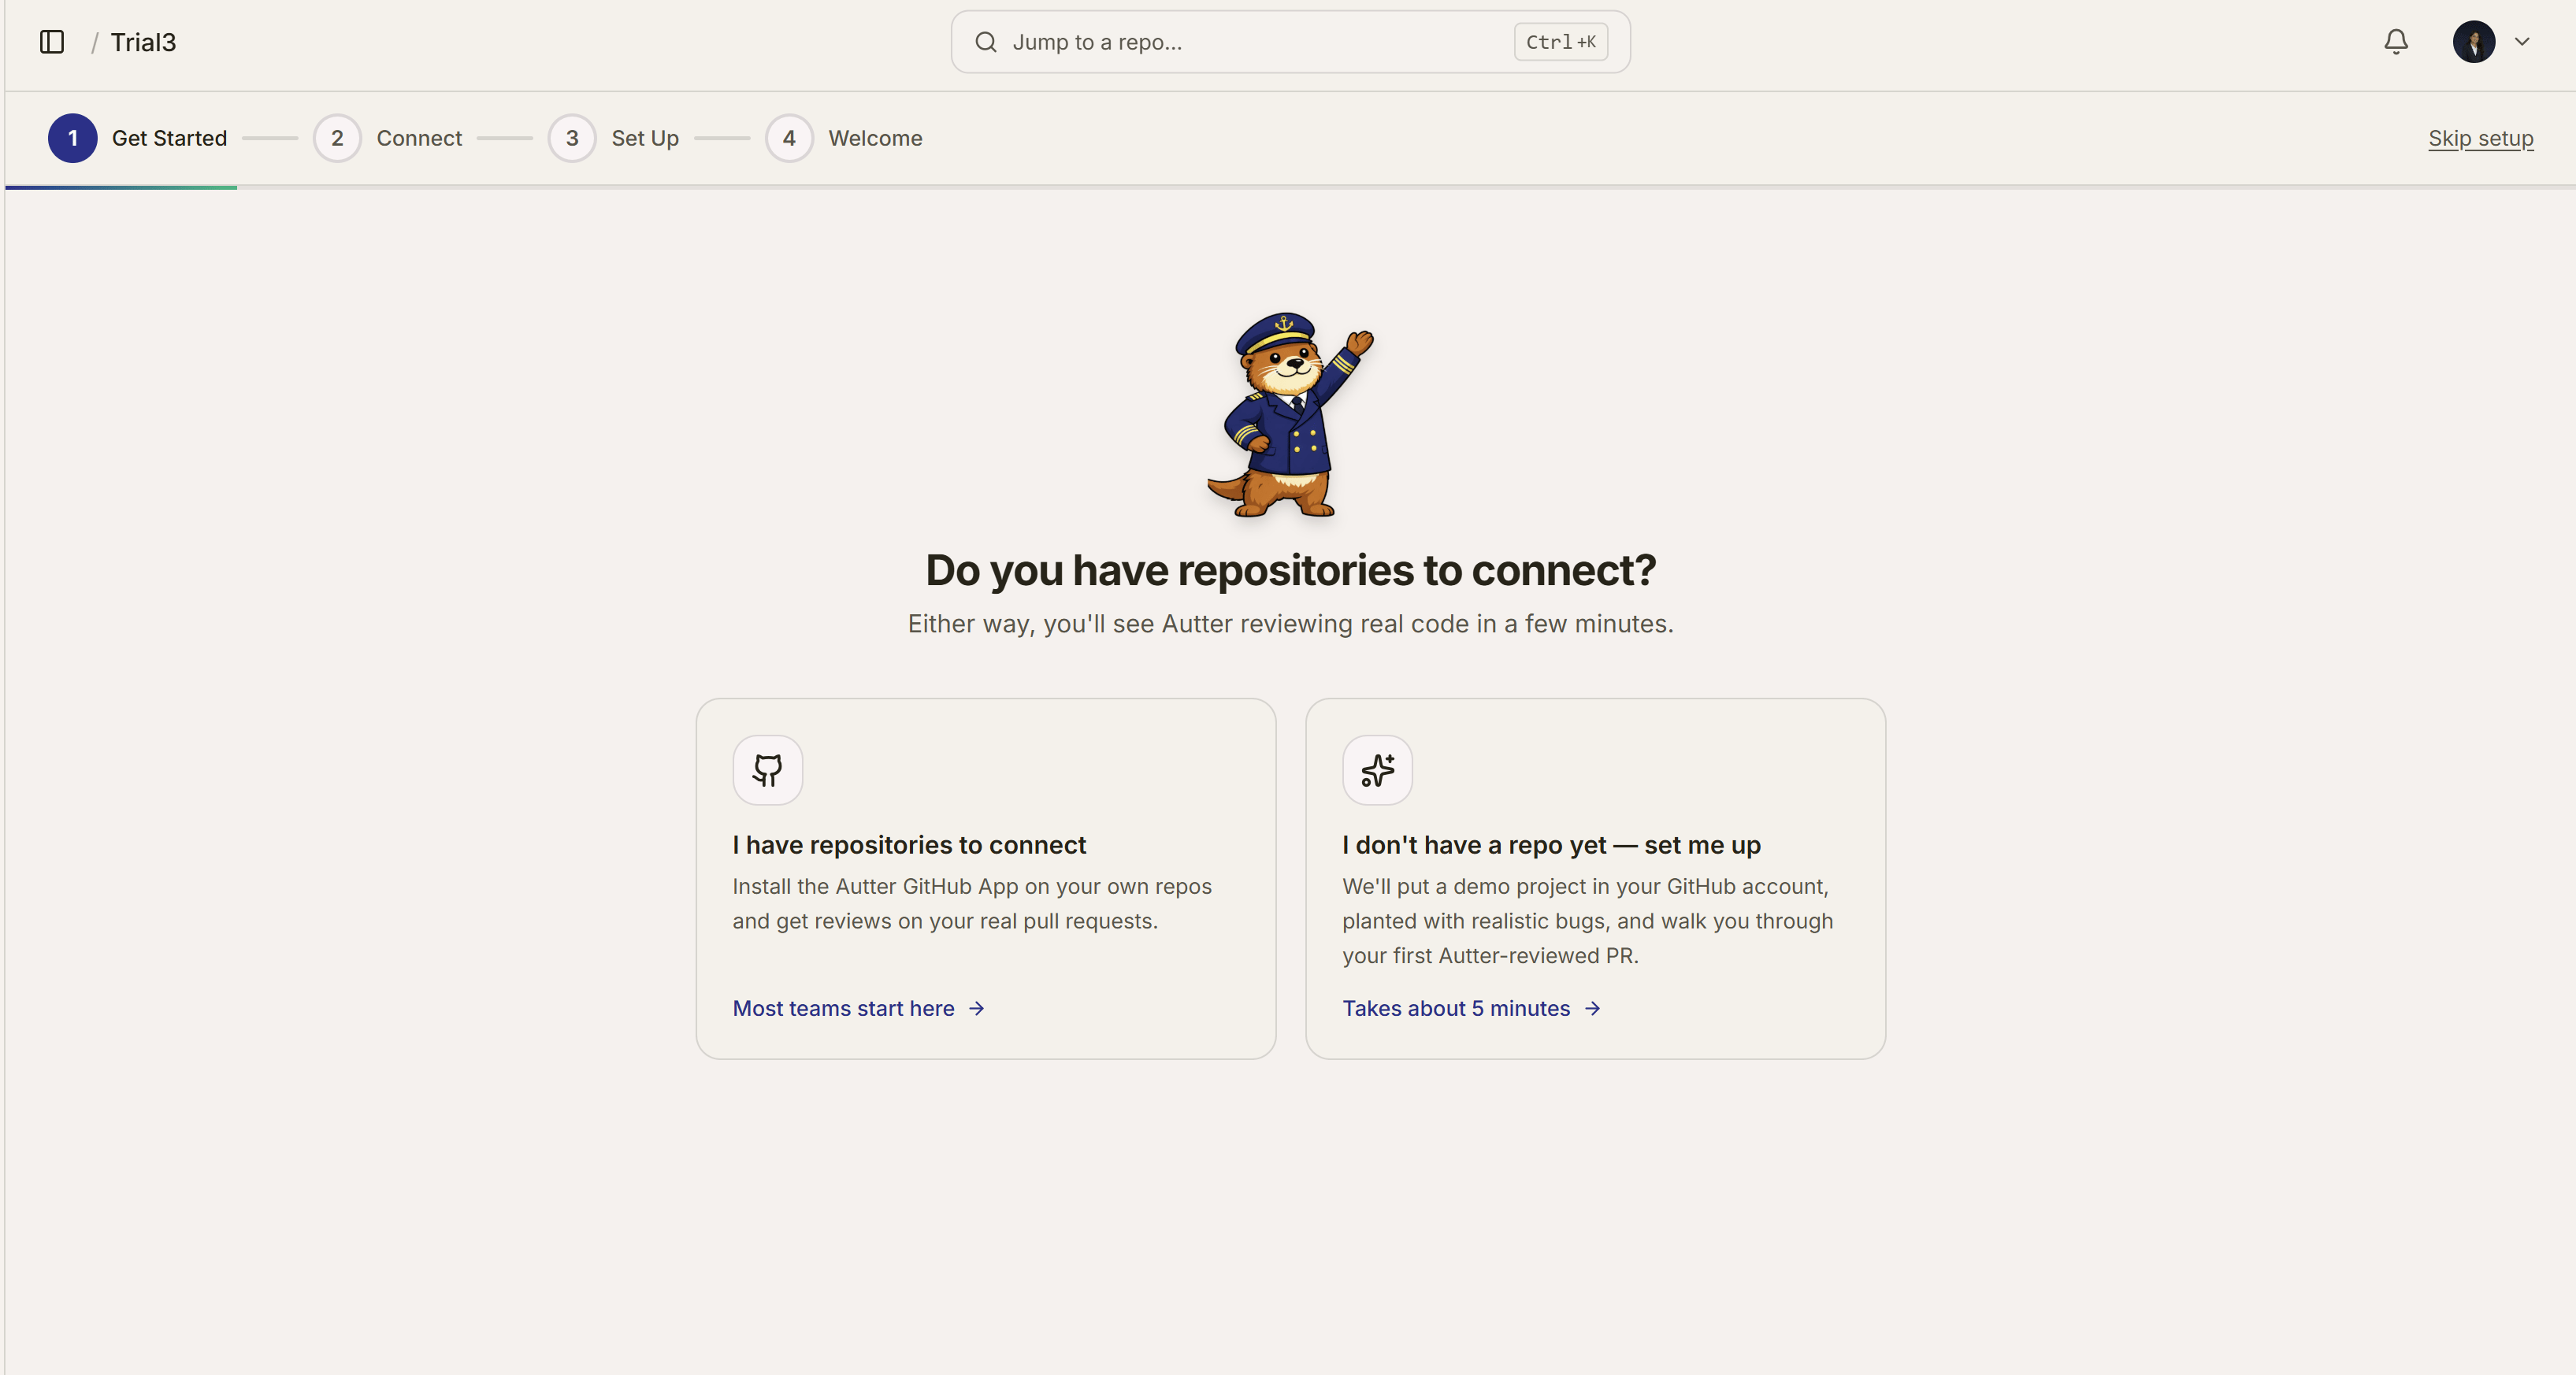
Choose an existing repository or let Autter set up a demo repository.
Install the Autter CLI
The Autter CLI supports macOS, Linux, Windows through WSL, and native Windows PowerShell.- macOS, Linux, and WSL
- Windows PowerShell
- npm
autter onboard.
CLI installation guide
Verify the installation and configure your coding agents.
Data and privacy
Compare local-only and connected data handling before you choose a mode.
Choose what to configure next
The platform works without a repository configuration file. Use platform settings to add natural-language rules and tune review behavior.Platform configuration
See the customer-facing controls available in the Autter platform.
CLI configuration
Configure local storage, connected mode, telemetry, and hosted endpoints for
autter.