
Start with a demo repository on GitHub or connect your own GitHub repository or GitLab project. Both paths begin with an Autter account and organization.

Before you begin

You need:
  • a GitHub or Google account to sign up for Autter
  • for the demo: a GitHub account where you can create a repository and install the Autter GitHub App
  • for your own repository: access to a GitHub repository or GitLab project, with permission to install or authorize the integration
You do not need an existing repository to try the demo. The demo setup creates a copy of a project in your GitHub account.

Create your account and organization

1

Sign up for Autter

Open app.autter.dev/login and sign up using GitHub or Google. If you already have an account, sign in.
2

Start creating your organization

Click + New Organization or Create Organization.
Autter organization menu with the New Organization option

Start a new organization from the Autter organization menu.

3

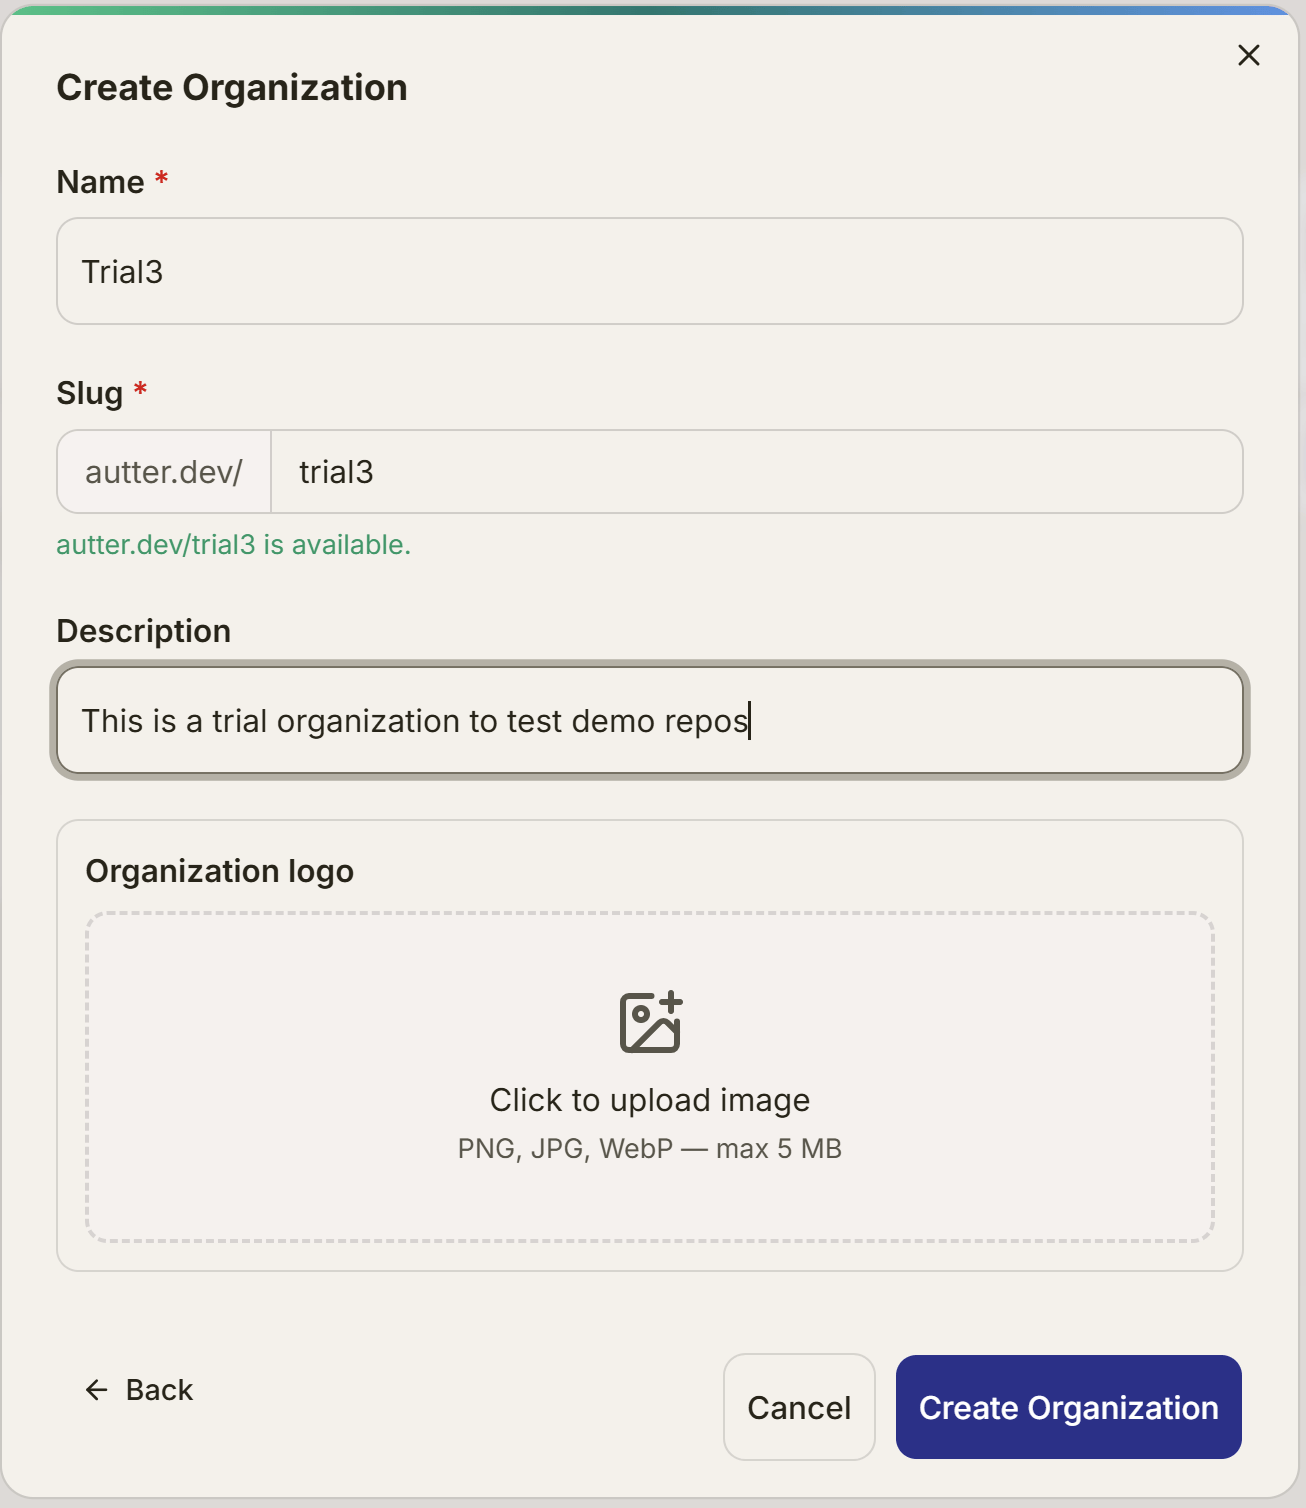
Create a trial organization

Follow the setup form to enter your organization’s details, then click Create Organization. The name, slug, and description shown below are examples. Use your own details.
Autter form for entering a trial organization name, slug, and description

Enter the details for your trial organization.

4

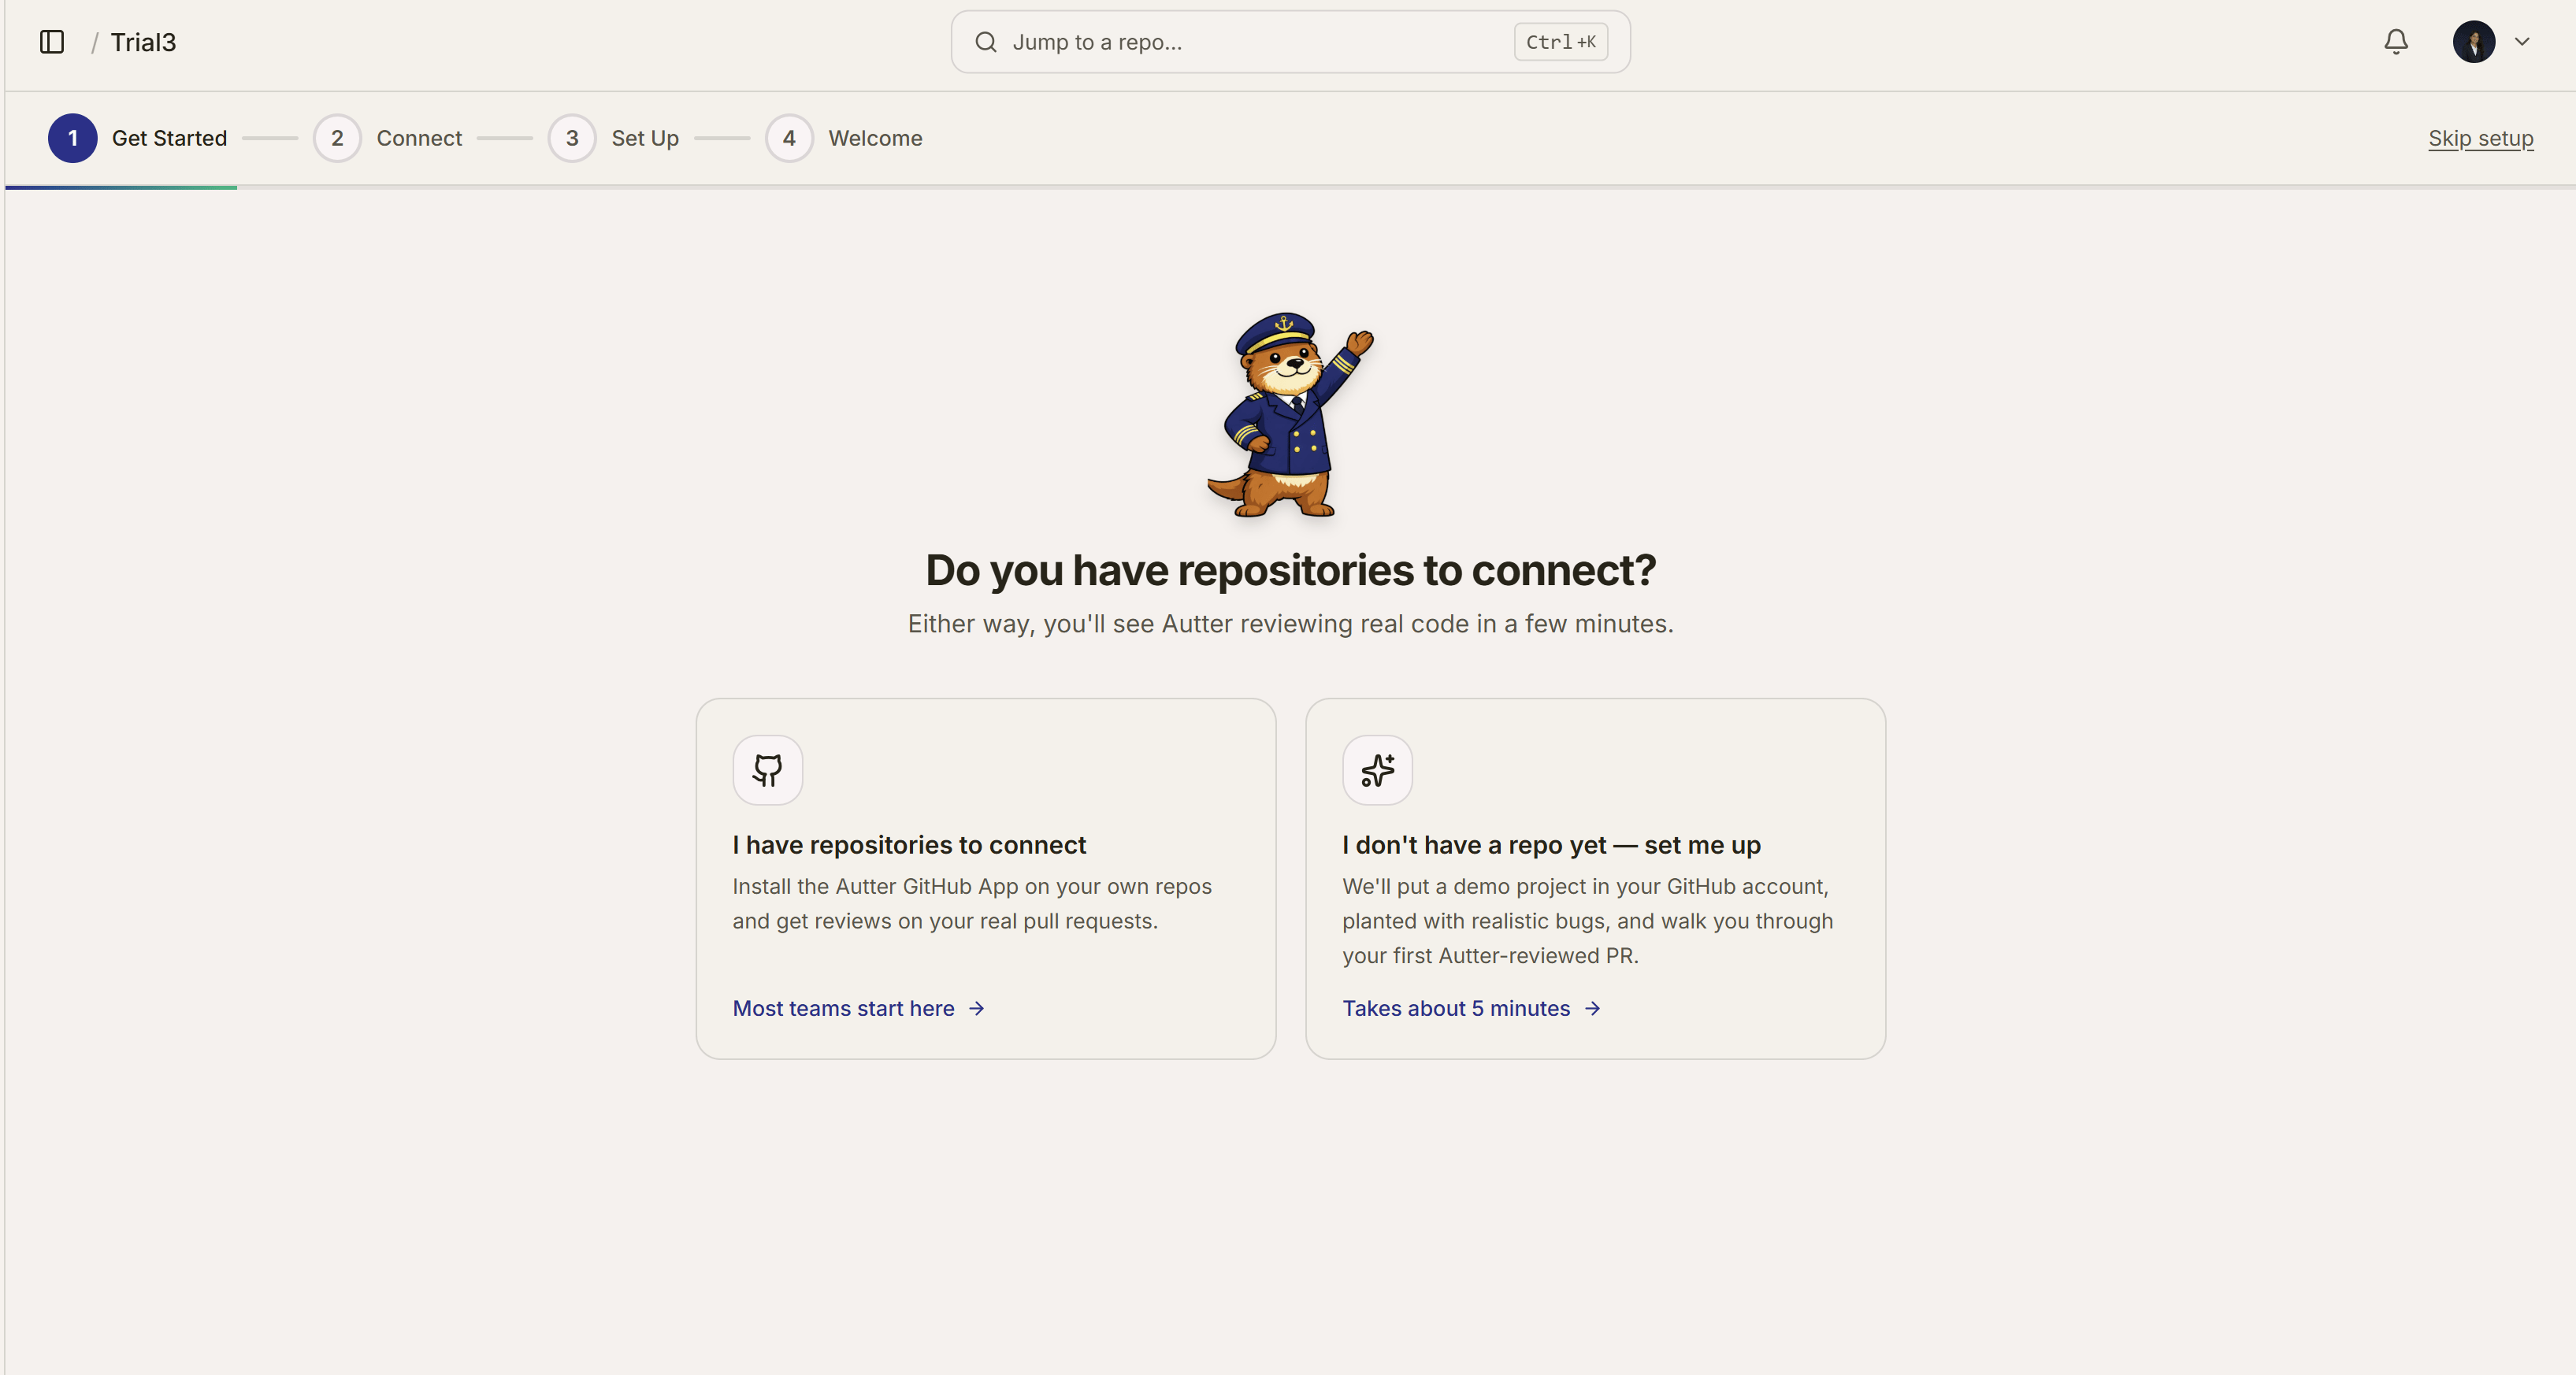
Choose how to start

After you create the organization, Autter opens repository selection. Continue with Try a demo repository or Connect your own repository below.
Autter workspace setup asking whether to connect an existing repository or create a demo repository

Choose an existing repository or let Autter set up a demo repository.

If you already have an Autter organization, open it and continue with repository selection.

Try a demo repository

1

Start the demo setup

On the repository selection screen, click I don’t have a repo yet — set me up.
2

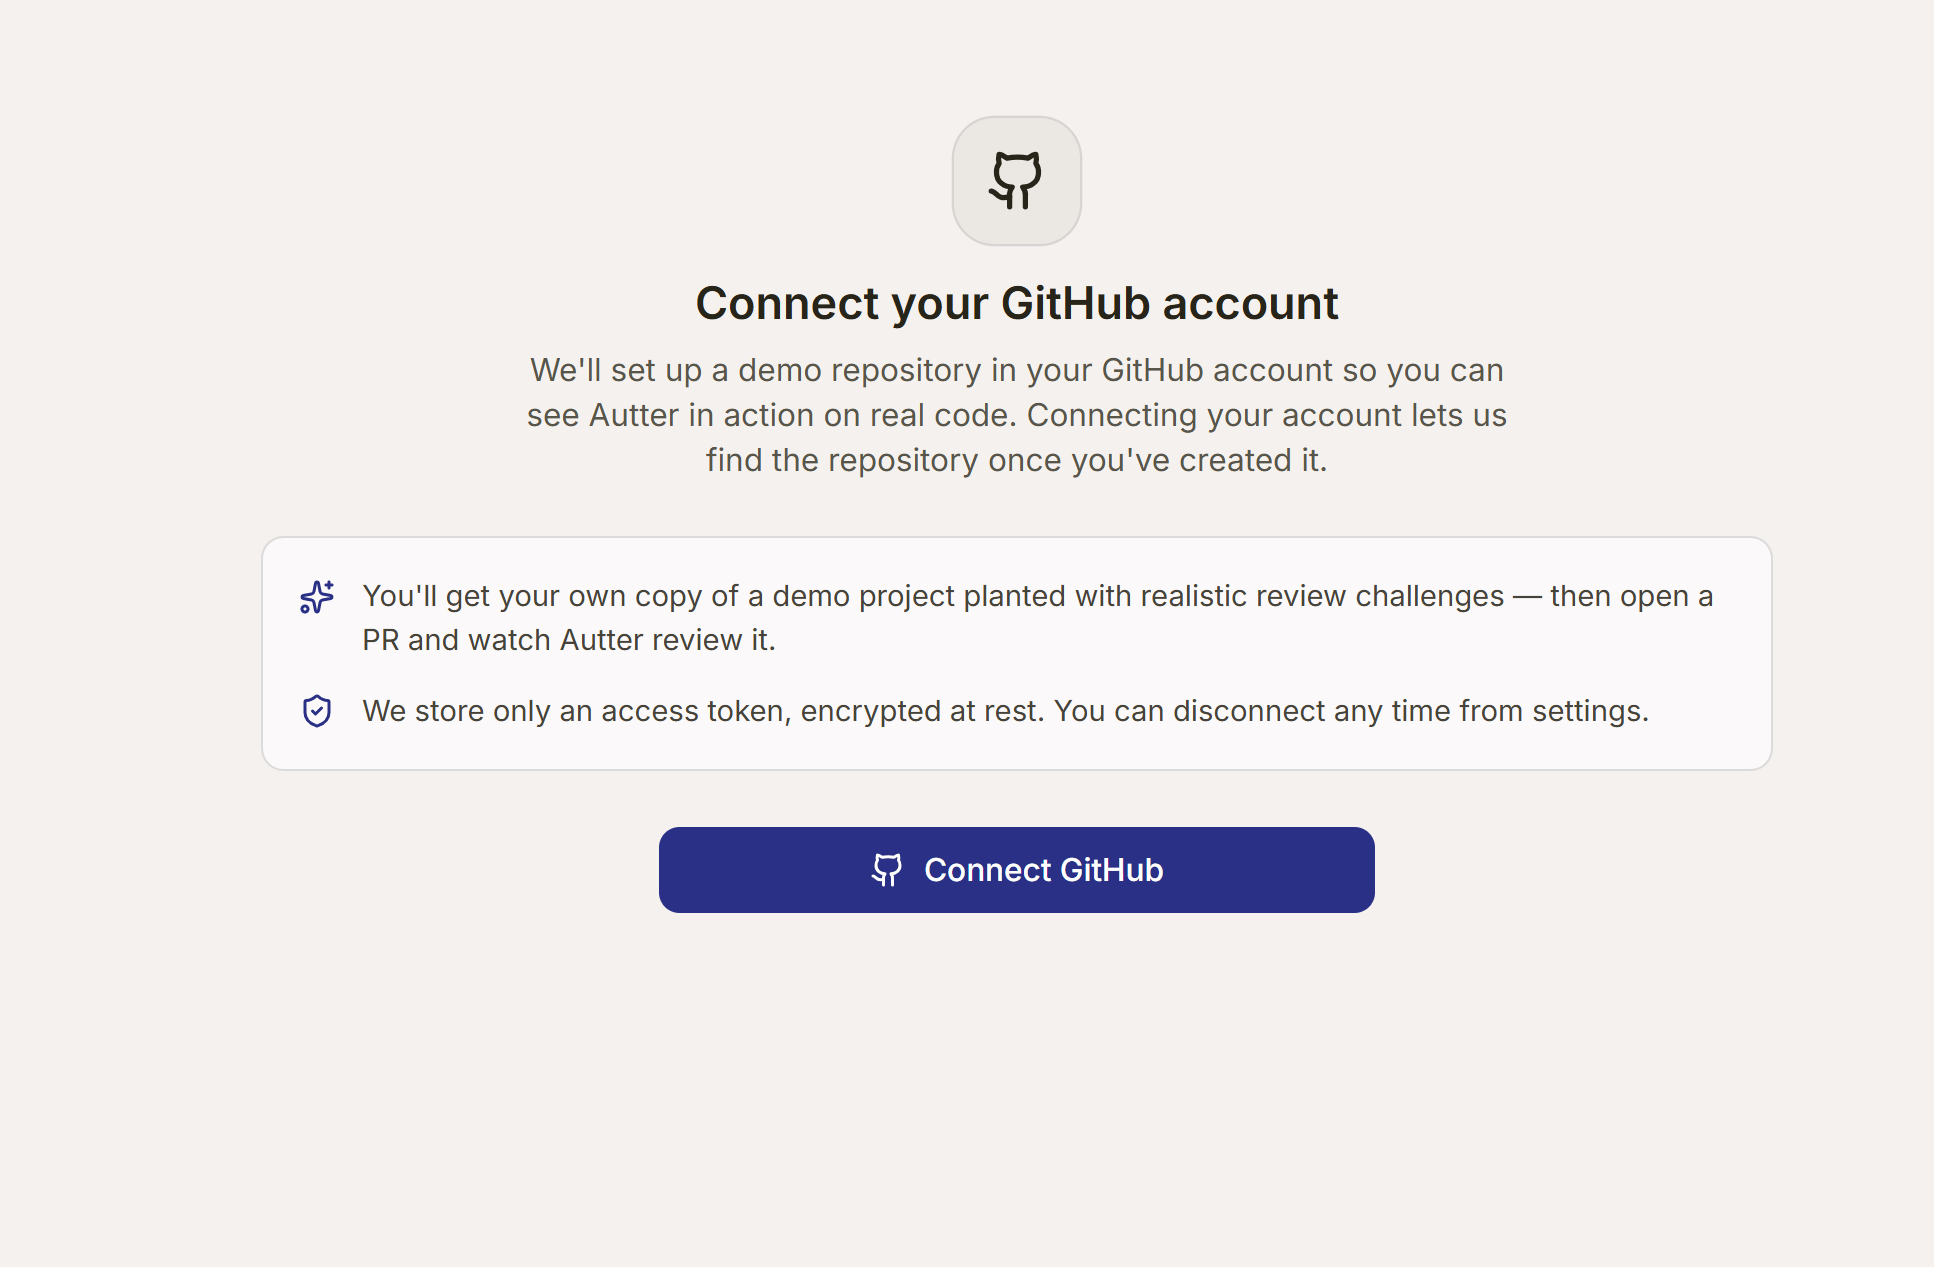
Connect your GitHub account

Click Connect GitHub and complete the account connection. You need this connection for the demo even if you signed up with Google.
Autter prompt to connect a GitHub account for the demo repository

Connect the GitHub account that will own the demo repository.

3

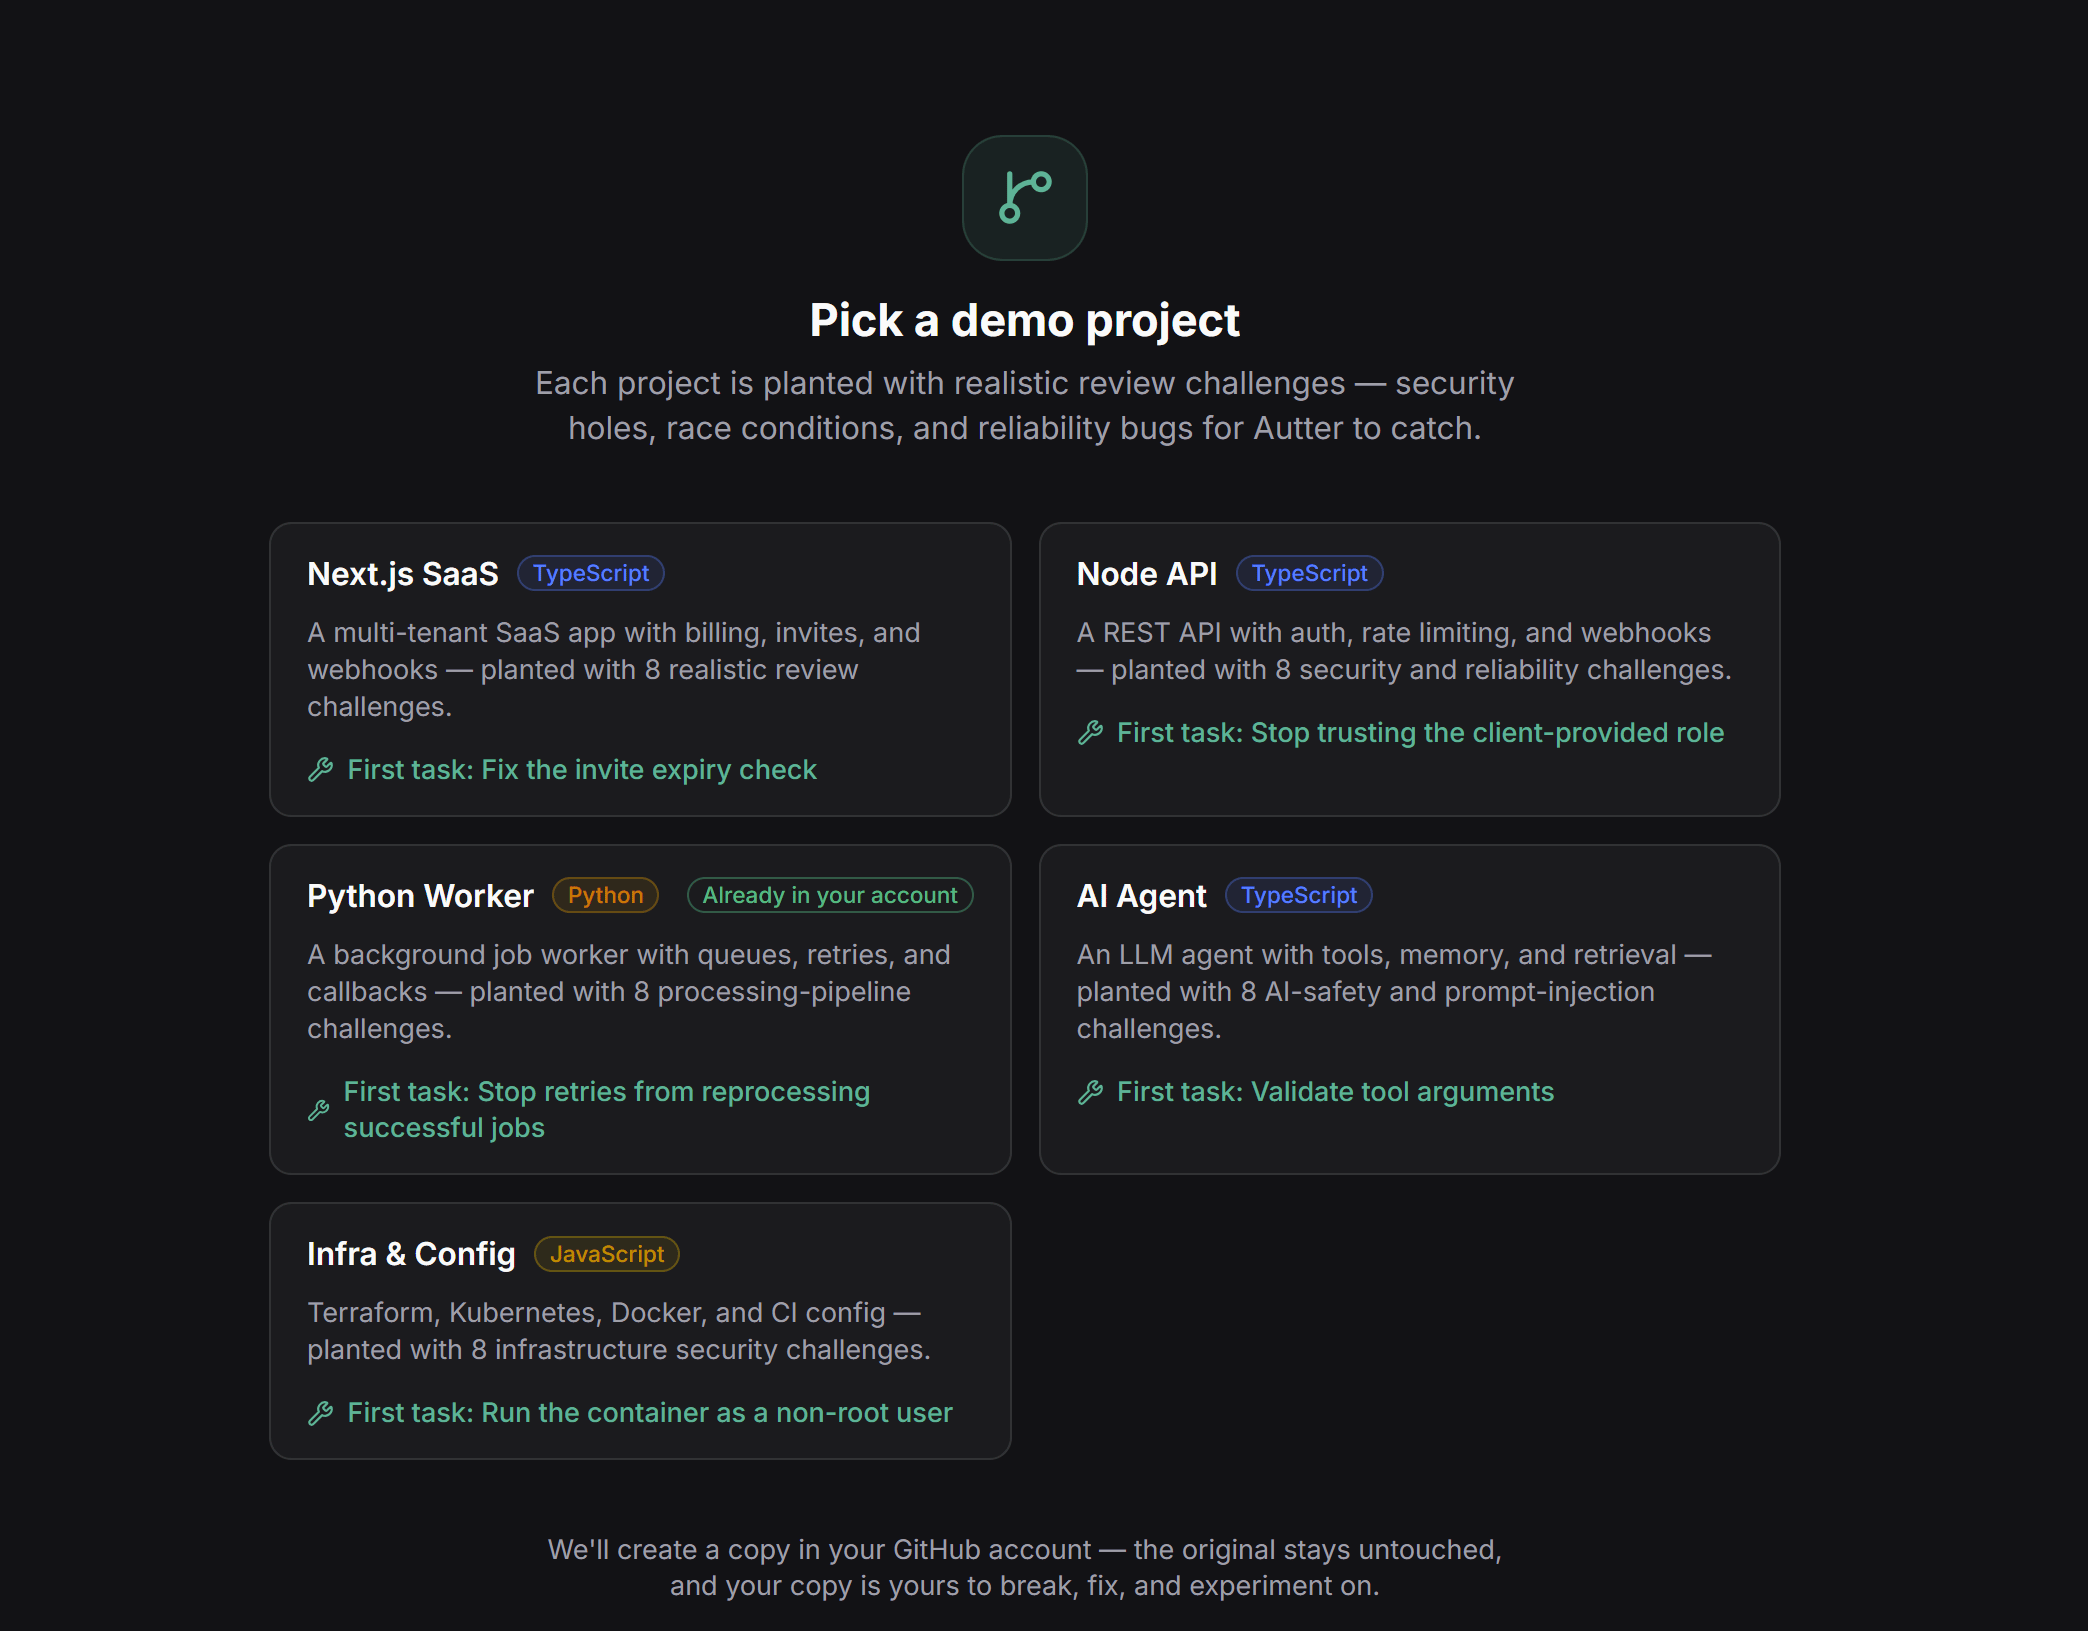
Pick a demo project

Return to the Autter dashboard and select a project. The demo choices include Next.js SaaS, Node API, Python Worker, AI Agent, and Infra & Config.
Autter demo project choices including Next.js, Node, Python, AI agent, and infrastructure projects

Select a demo project in Autter.

4

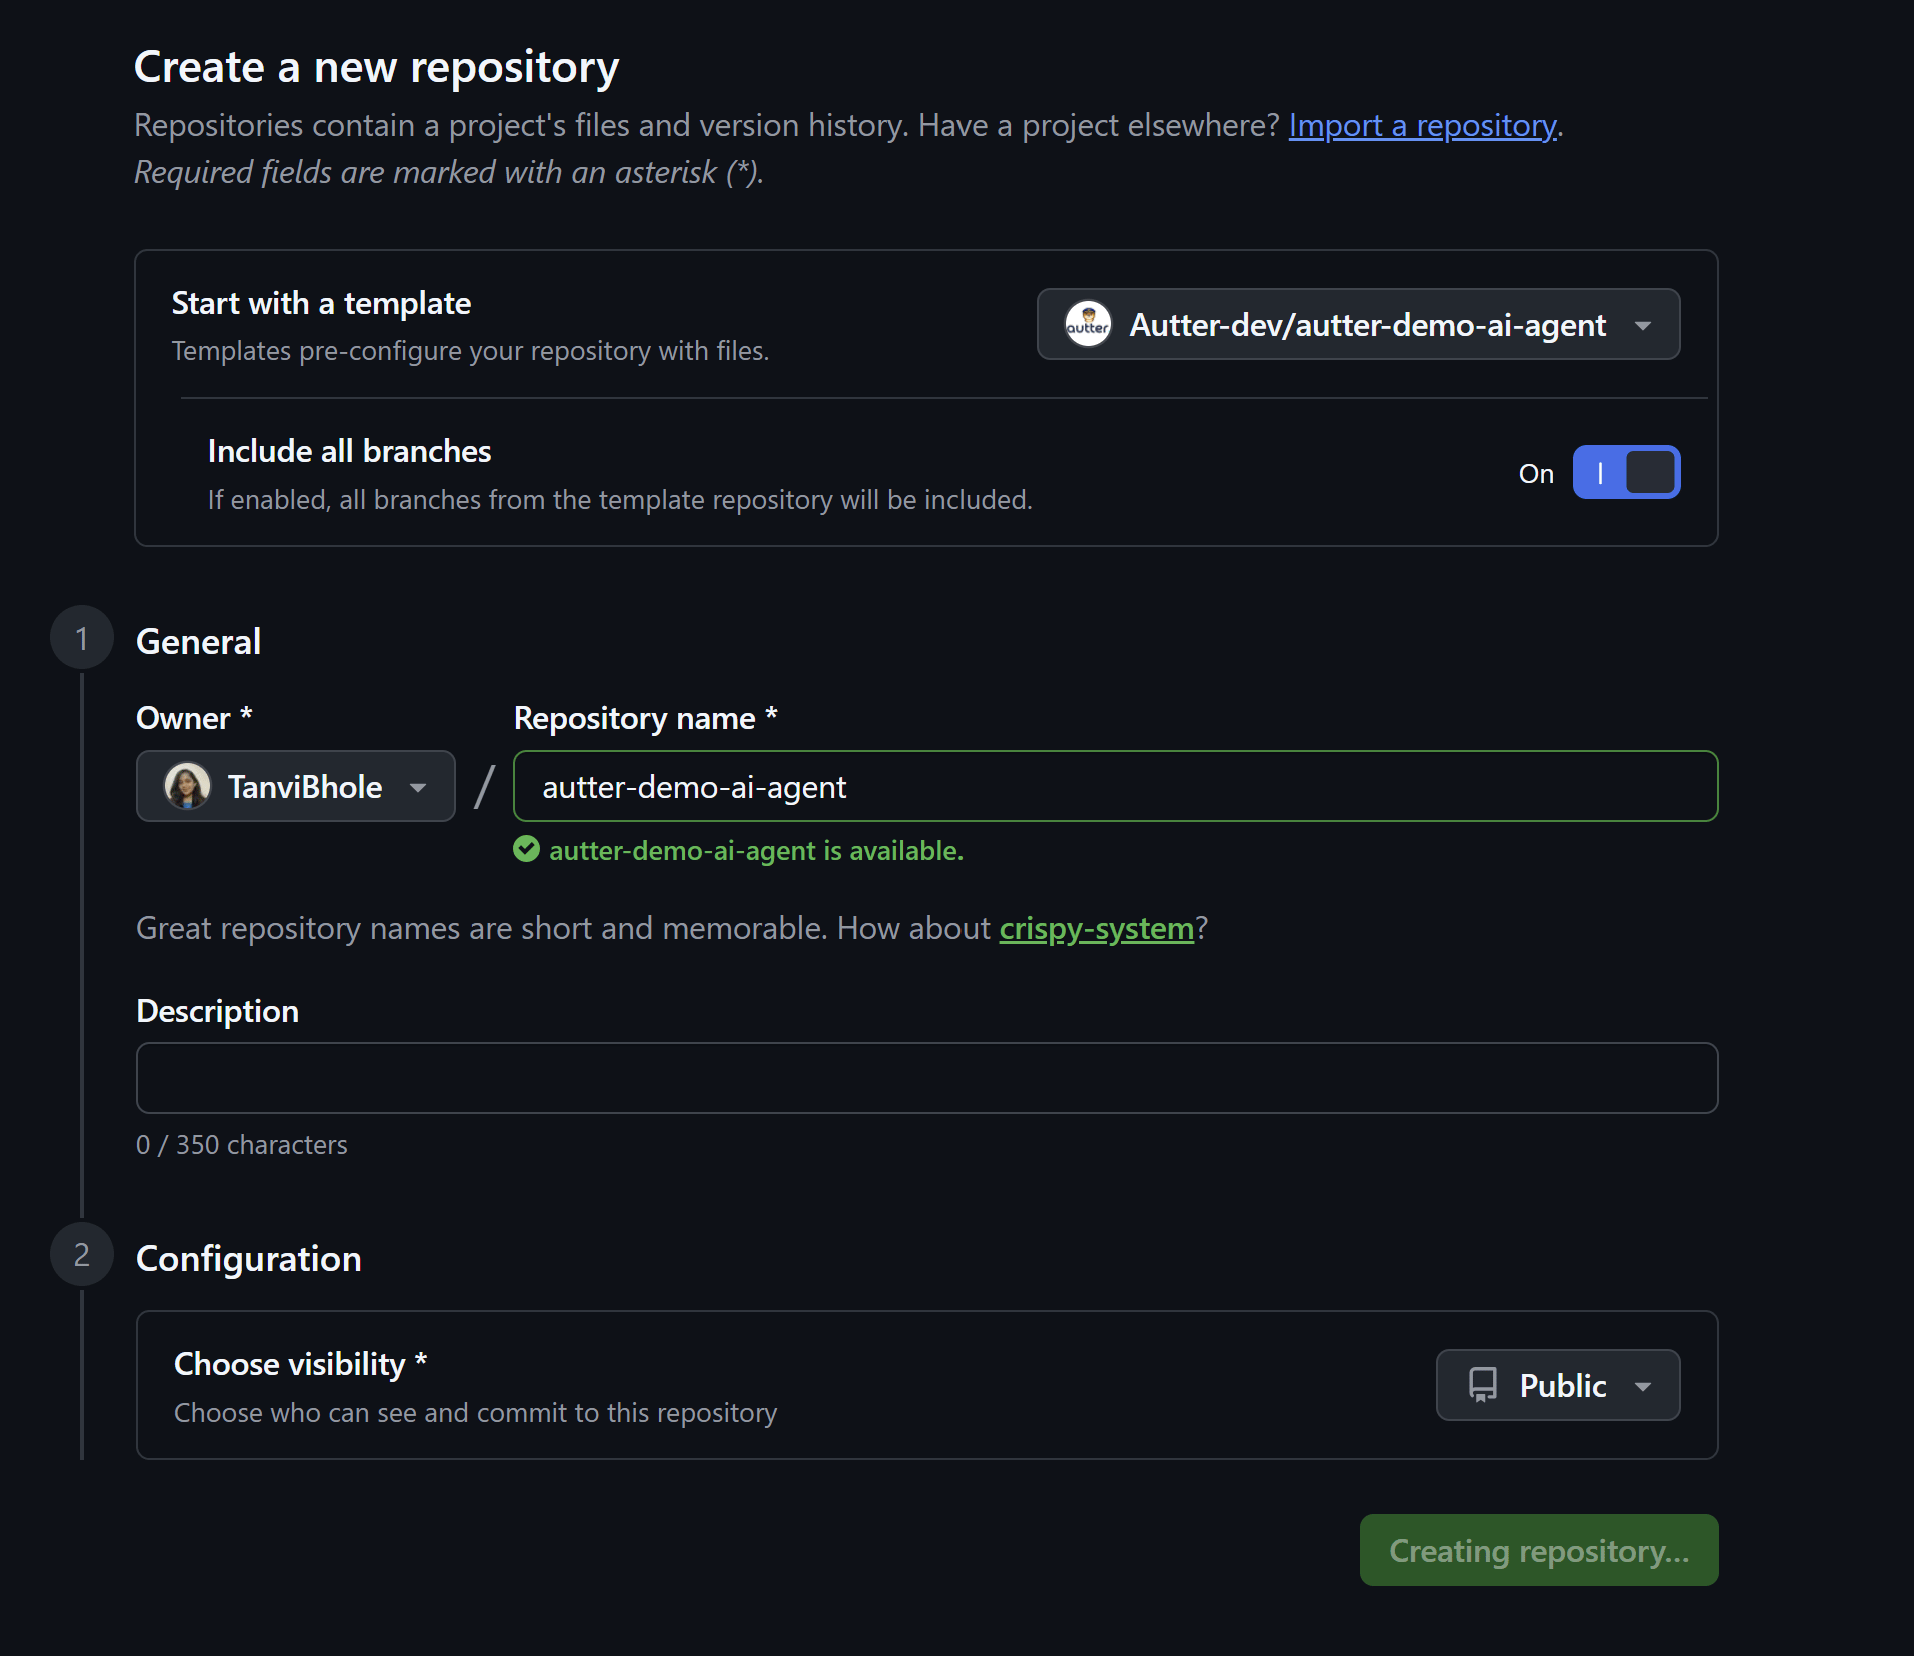
Create your copy on GitHub

Follow the GitHub form to create a copy of the selected project. Choose your GitHub owner and a repository name, then finish creating the repository.
GitHub form for creating a repository from the selected Autter demo project

Create your copy of the demo project on GitHub.

5

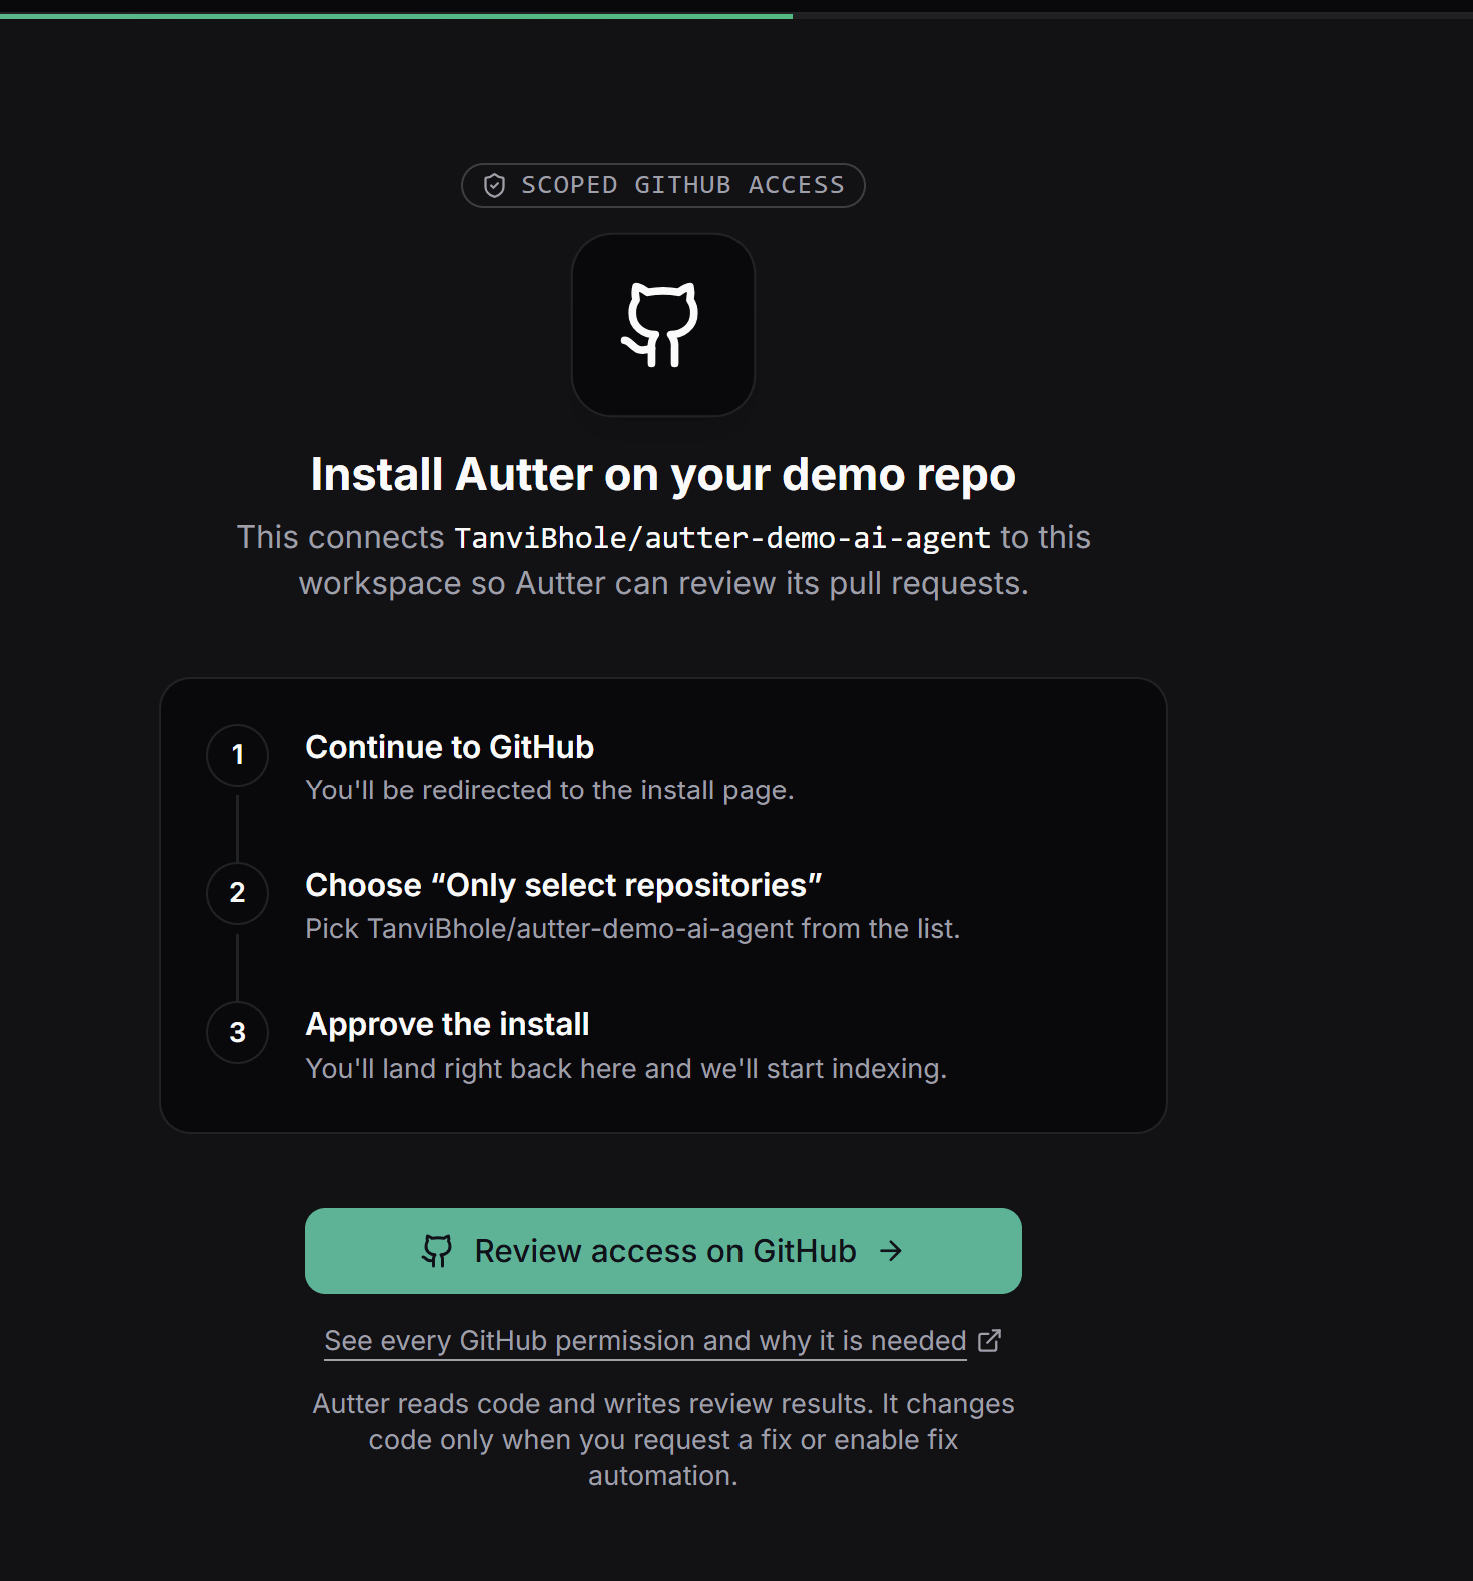
Install Autter on the demo repository

Return to the Autter platform and click Review access on GitHub. On GitHub, choose Only select repositories, select your new demo repository, and approve the installation.
GitHub App installation screen for granting Autter access to the selected demo repository

Review GitHub access and include the new demo repository.

6

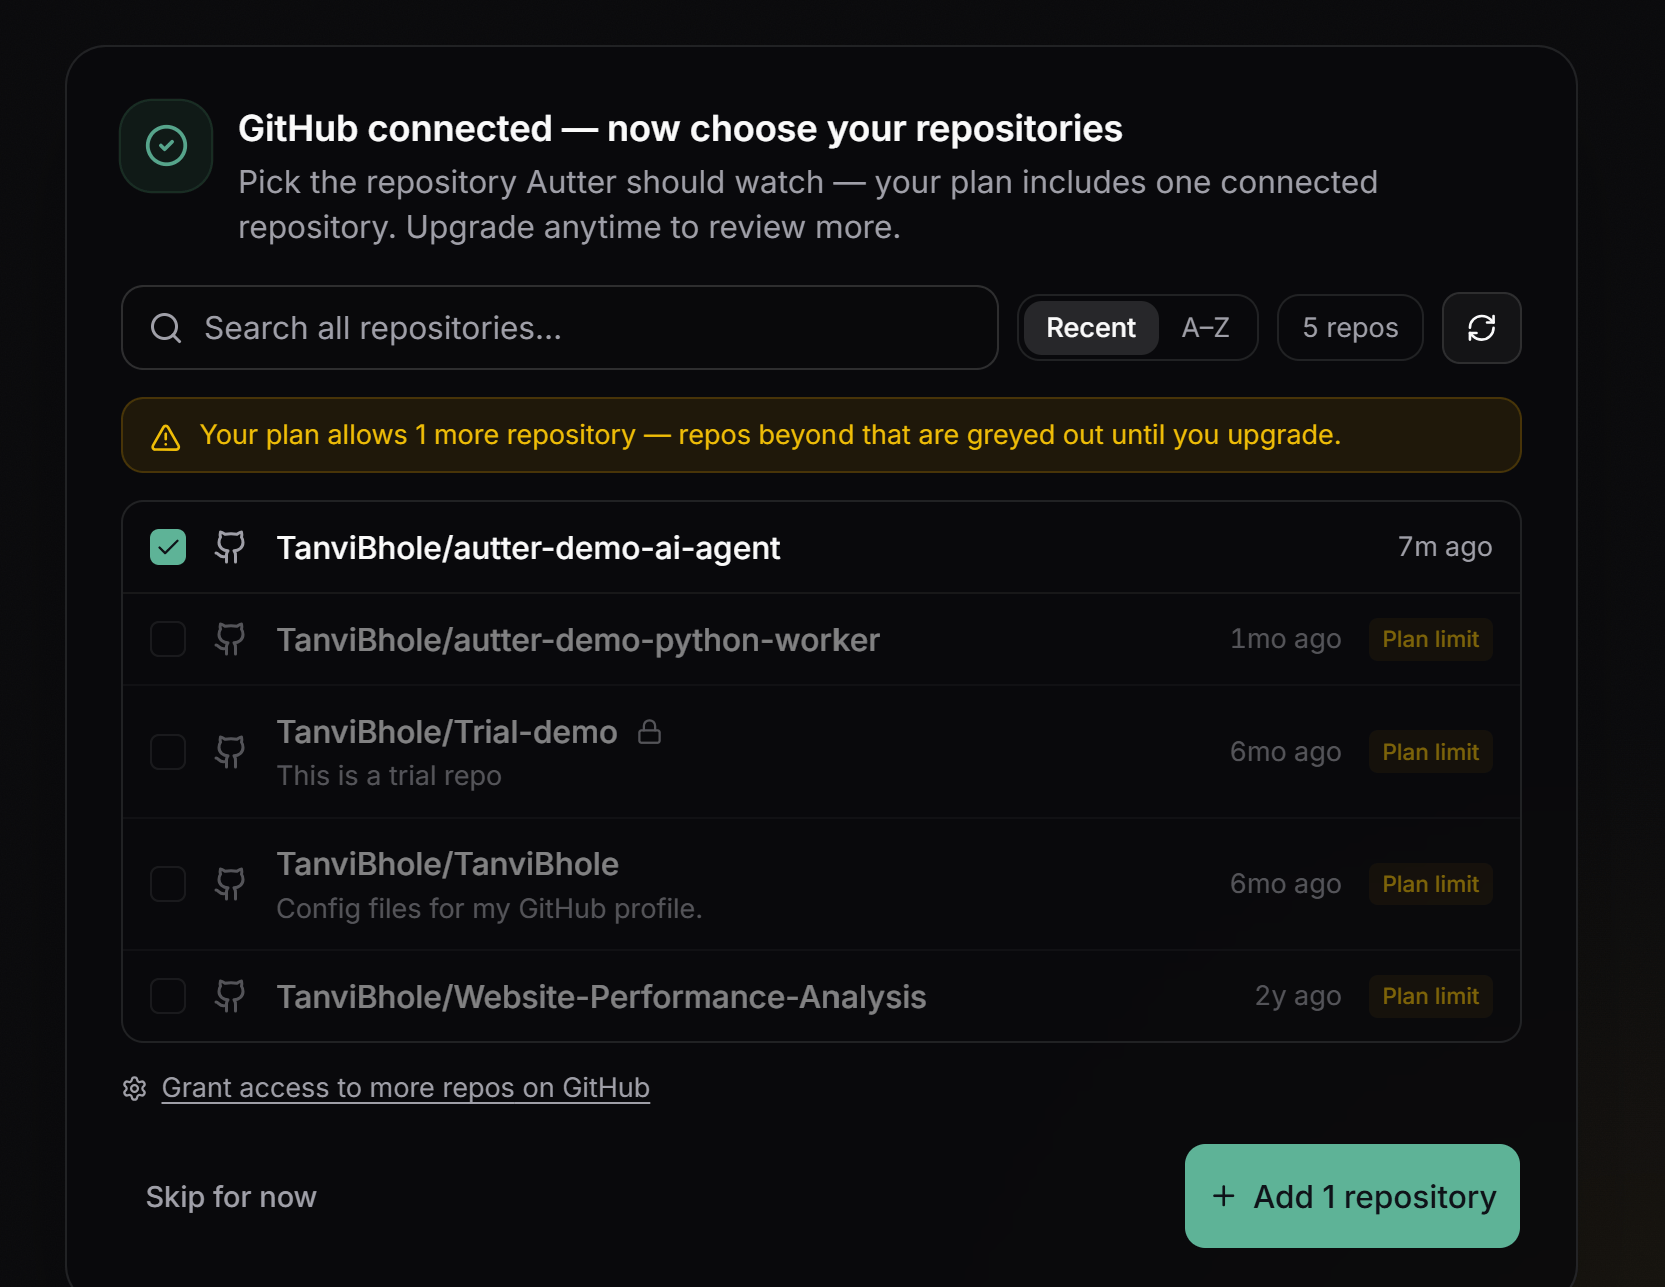
Add the demo repository to Autter

Return to Autter and select the demo repository you created. Click Add 1 repository to connect it to your organization.
Autter repository selection screen with the copied demo repository selected

Select the copied demo repository and add it to Autter.

7

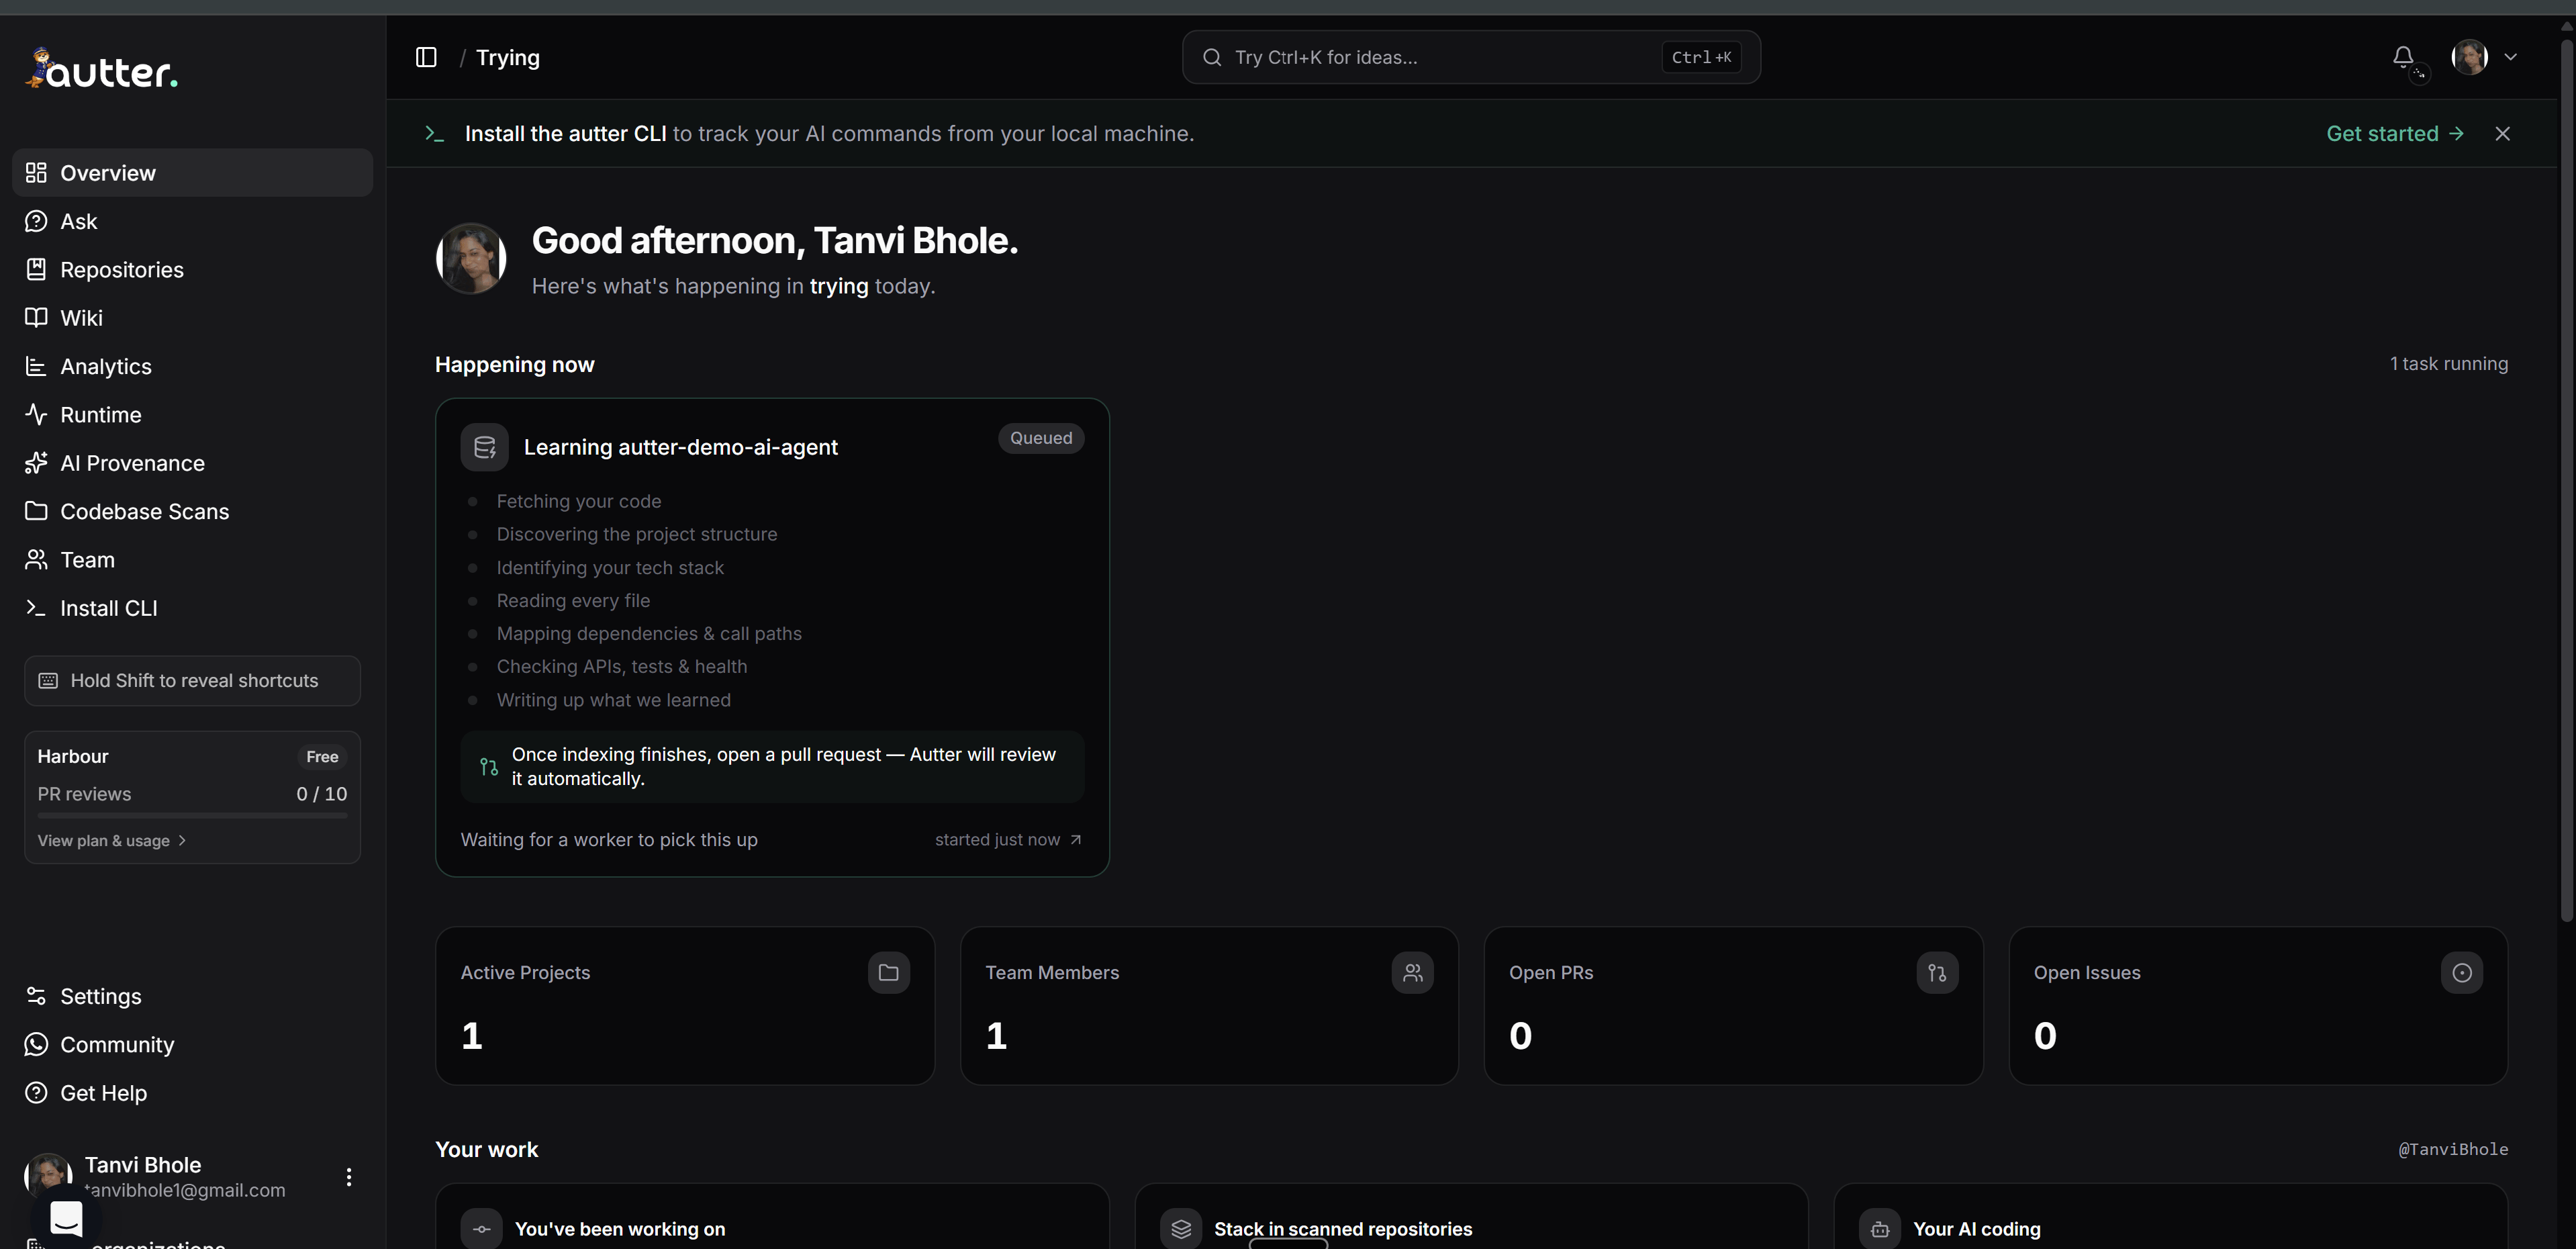
Open your workspace

Open the connected repository in the Autter platform to explore the trial. Continue with Get your first review when you are ready to try a pull request.
Connected Autter workspace showing repository activity and scan findings

Explore your connected demo repository in the Autter workspace.

Connecting your GitHub account, granting the Autter GitHub App repository access, and adding the repository to Autter are separate steps. Complete all three to finish setup.

Connect your own repository

Use the repository selection screen in your Autter organization to connect an existing repository. You can start here directly or connect your own repository after trying the demo.
1

Choose your own repository

On the repository selection screen, click I have repositories to connect.
2

Connect GitHub

Complete the authorization flow for the account or organization that owns your repository.
3

Grant repository access

Install the Autter GitHub App or update its access. Choose Only select repositories and include the repository you want to try.
4

Add the repository to Autter

Return to Autter, select your repository, and click Add 1 repository when selecting a single repository.
See GitHub setup for connection checks and troubleshooting.

Get your first review

After connecting either a demo repository or your own repository:
  1. Open a pull request on the connected GitHub repository, or a merge request on the connected GitLab project.
  2. Check the Autter platform for the review status.
  3. Look for an Autter review summary, inline findings, or an Autter check in your source control provider.

Evaluate the feedback

Check that the review gives the author enough context to act:
  • the affected code or behavior
  • why the finding matters
  • a proposed fix when Autter can provide one
  • the severity or merge impact
If the feedback is too broad or too noisy, adjust the review behavior and add team rules. See Configuration.

Next steps

After you try the first review, you can: See current pricing for plan details before expanding your rollout.

Troubleshoot the connection

If a repository is missing from selection, confirm that the integration has access to it. For a demo repository, check that you finished creating your copy on GitHub and included that copy in the App’s repository access. If no review appears after connecting a repository:
  1. Confirm the repository is included in the integration’s access scope.
  2. Confirm you selected and added the repository in your Autter organization.
  3. Check the Autter platform for a connection or review status.
  4. Reopen or update the pull request after fixing access.